campaign fundamentals
Understand the campaign wizard
Learn how to understand the campaign wizard with a safe Juniper & Trail example, shopper impact, options, and recovery checks. The six steps are Basics, Discount, Products, Theme, Labels, and Review. Later steps depend on earlier choices, so revisit Review after changing the discount route, product scope, schedule, or theme components.
Before you begin
- Decide the offer goal and the storefront components it needs
- Know which products may change
- Confirm who may launch or delete campaigns
Keep the campaign in Draft while you verify the configuration. Use a private storefront window where the guide changes shopper-facing behavior.
Step-by-step setup
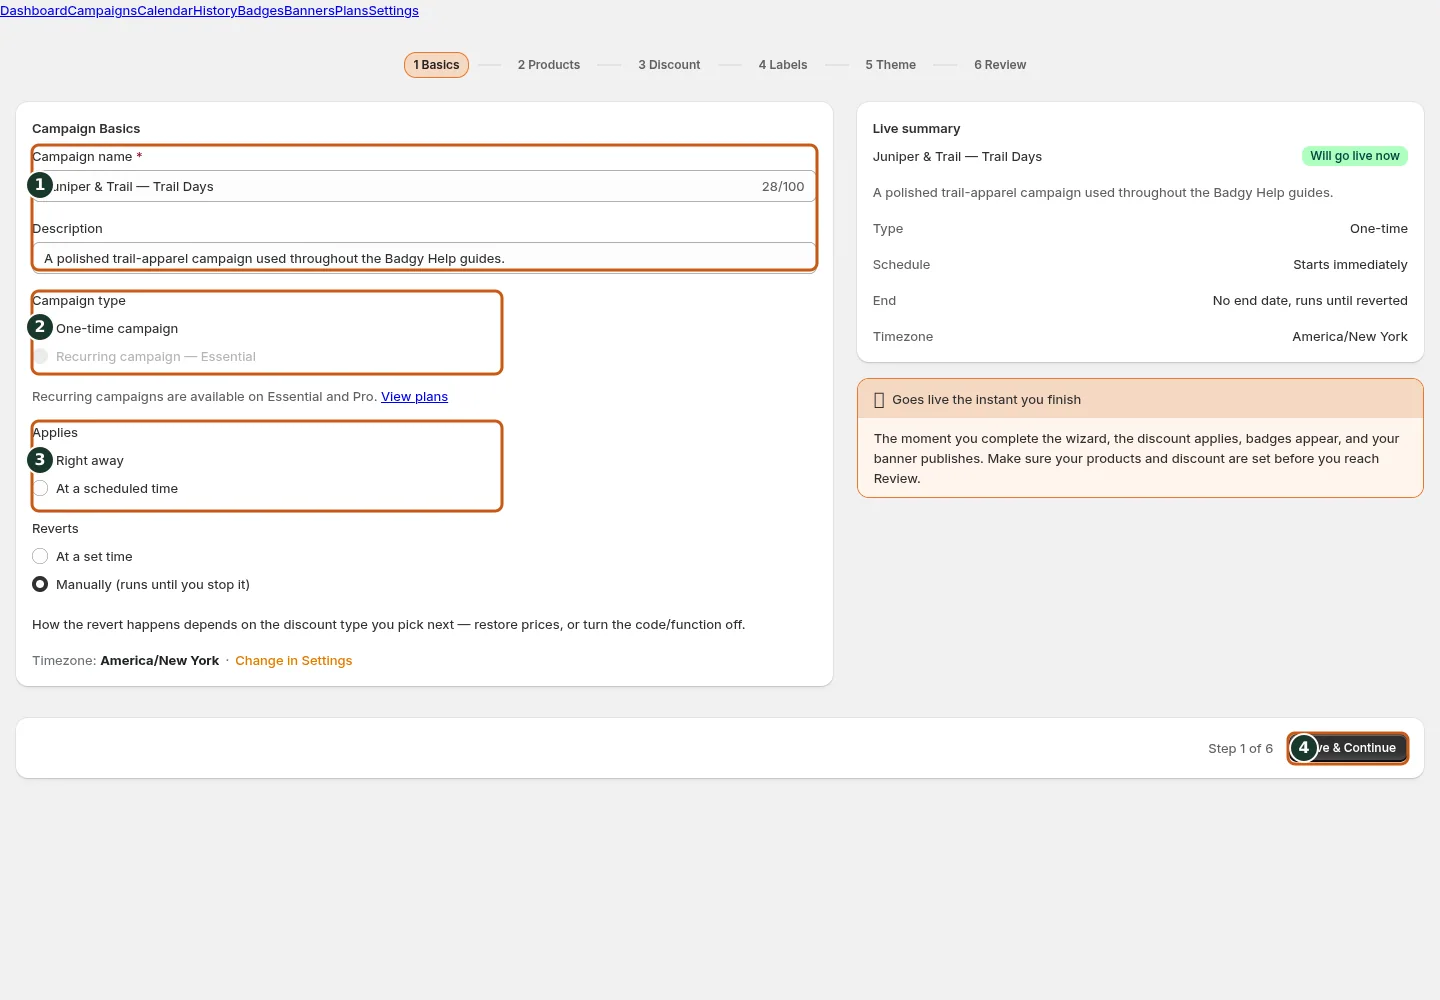
Name and describe the campaign so teammates can identify its purpose.
Choose whether the campaign runs once or repeats on a schedule.
Set when the campaign should begin.
Choose whether the campaign ends automatically or stays open.
Save the basics and continue to the next wizard step.
- Basics: name the campaign and define one-time or recurring timing.
- Discount: choose direct price, discount code, volume, or BOGO and complete its controls.
- Products: choose scope, optional variant refinement, exclusions, and preview.
- Theme and Labels: configure banner and badge presentation.
- Review: resolve completeness and token warnings, then save or launch.
The six steps are Basics, Discount, Products, Theme, Labels, and Review. Later steps depend on earlier choices, so revisit Review after changing the discount route, product scope, schedule, or theme components.
Juniper & Trail example
Juniper & Trail prepares a Weekend Trail Kit campaign for packs, drinkware, and camp accessories. The team uses understand the campaign wizard while keeping the campaign in Draft until review is complete. The documentation fixture uses realistic products, inventory states, variants, collections, and protected exclusions so the preview exercises the same decisions as a merchant catalog.
What shoppers will see
Shoppers see only the capabilities you enabled, and only after activation completes for those phases. Check the relevant result from product through cart where applicable. For shopper-facing work, compare desktop and mobile and verify both an eligible and an ineligible item.
Common mistakes and troubleshooting
- Acting on the wrong shop. Confirm the Shopify store and campaign before following Understand the campaign wizard.
- Trusting a stale preview. Refresh after catalog, schedule, discount, theme, locale, or market changes.
- Repeating a background command. Read status and History first; retry only when Badgy presents a recoverable failure.
- Skipping the consequence check. Confirm what changes for shoppers and what the end or restore path will do.
If the status reports revoked authorization, reconnect Shopify before retrying. If the result still differs from the preview, preserve the campaign ID and approximate time, then open support from this identified shop. Never send customer data, access tokens, or full catalog exports in feedback.
Related guides
Options reference
| Option | Use it when | Consequence | | --- | --- | --- | | Basics | Identity and schedule | Controls activation/revert timing | | Discount | Offer mechanics | Controls Shopify price or discount behavior | | Products | Eligibility | Scope → refine → exclude | | Theme / Labels | Shopper presentation | Requires storefront rendering | | Review | Final consistency gate | Return to any incomplete step |
Badgy behavior in this guide is reviewed against the repository's shipped UI, service rules, and feature design documents. Shopify-owned theme, Markets, Flow, billing, and discount behavior can also depend on the store's Shopify configuration; consult the Shopify Help Center for that platform configuration.