settings
Export your Badgy data
Learn how to export your Badgy data with a safe Juniper & Trail example, shopper impact, options, and recovery checks. Exports are generated for the identified shop and preserve the existing additive event contract. Store exported files securely and use the documented date or record scope to avoid unnecessary data.
Before you begin
- Shop-owner or authorized staff access
- A record of the current setting
- A plan for how the change affects scheduled campaigns
Confirm the shop, current status, and intended consequence before changing anything. Use read-only status, preview, or history evidence first.
Step-by-step setup
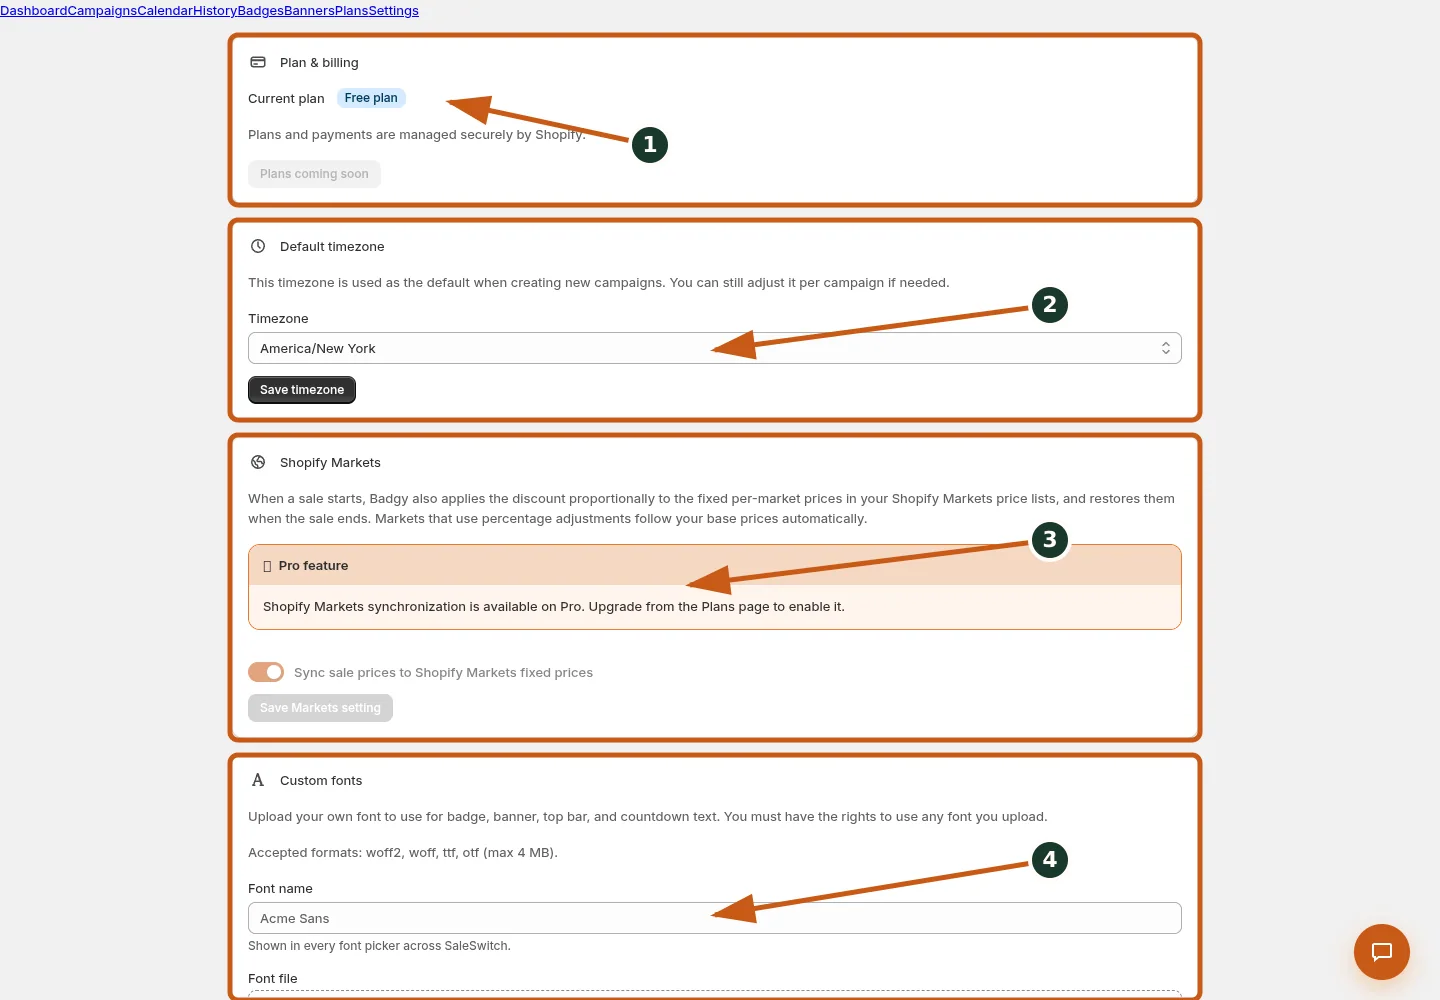
Check the current plan before configuring plan-dependent settings.
Set and save the default timezone used when creating campaigns.
Review Shopify Markets synchronization availability and its plan requirement.
Name and upload an approved custom font for storefront campaign components.
- Open Settings → Account → Data export for the intended shop and confirm the current record and status.
- Choose Download export; the authenticated route creates a shop-scoped web download without navigating away.
- Read the inline summary, warning, or preflight before submitting; do not repeat a command while background work is running.
- Open the file, verify expected additive records, store it securely, and delete local copies when no longer needed.
- Confirm the resulting status and History/audit evidence, then spot-check Shopify or the storefront when the action has external effects.
Exports are generated for the identified shop and preserve the existing additive event contract. Store exported files securely and use the documented date or record scope to avoid unnecessary data.
Juniper & Trail example
Juniper & Trail records the current value, applies export your badgy data, and verifies a draft preview before relying on the change for its next campaign. The documentation fixture uses realistic products, inventory states, variants, collections, and protected exclusions so the preview exercises the same decisions as a merchant catalog.
What shoppers will see
Some settings affect only admin presentation; storefront-facing settings should be checked in every supported locale and market. Check the relevant result from product through cart where applicable. For shopper-facing work, compare desktop and mobile and verify both an eligible and an ineligible item.
Common mistakes and troubleshooting
- Acting on the wrong shop. Confirm the Shopify store and campaign before following Export your Badgy data.
- Trusting a stale preview. Refresh after catalog, schedule, discount, theme, locale, or market changes.
- Repeating a background command. Read status and History first; retry only when Badgy presents a recoverable failure.
- Skipping the consequence check. Confirm what changes for shoppers and what the end or restore path will do.
If the status reports revoked authorization, reconnect Shopify before retrying. If the result still differs from the preview, preserve the campaign ID and approximate time, then open support from this identified shop. Never send customer data, access tokens, or full catalog exports in feedback.
Related guides
Options reference
| Option | Use it when | Consequence | | --- | --- | --- | | Web download | Obtain current shop export | No separate downloadable guide | | Shop scope | Authenticated merchant data | No cross-shop records | | Additive contract | New event fields may appear | Consumers tolerate additions |
Badgy behavior in this guide is reviewed against the repository's shipped UI, service rules, and feature design documents. Shopify-owned theme, Markets, Flow, billing, and discount behavior can also depend on the store's Shopify configuration; consult the Shopify Help Center for that platform configuration.